


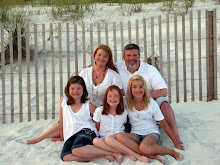
Check out these charms that I made using family photo's! I saw the idea from Stories by Me blog. She has a real cute tutorial on how to make these charms (If you have not been to her blog you should go spend some time over there checking out all her cute crafts how-to's) Let me go over how I made these charms and what I learned while making them.
1. You will need to purchase Shrinky Dink paper for the Ink Jet Printer
notice I "highlighted" the word Ink Jet printer. They make two types of Shrinky Dink paper, and you bet ya! The first trip to the store I came home with the wrong type of Shrinky Dink paper (Just FYI Michael's does not carry Shrink Dink for the Ink Jet Printer -at least mine does not. I found the correct type of paper at Hobby Lobby) and yes there really is a difference in the paper (on the wrong paper the ink beads up like water on fabric that has been scotch guarded - urrr!)
2. You will need to print your pictures out on the Shrinky Dink paper for the Ink Jet Printer approx. the size of a school picture your kids get every year. (I believe Stories by Me blog does list measurements)
 **note: learn from my mistake do not get so carried away making the perfect grid to print out -that your forget that you will be cutting those suckers out and nobody, and I mean nobody will know how they looked when you printed them out. Also you will need to lighten your pics. to about 50% for printing or choose transparancy for print option.
3. You will need to cut them out individually, use a corner rounder (if you want to) and use the Hole punch to make a hole before baking them!!!
note: I did not use a small hole punch -the holes shrink to, I used just my standard size.
4. Trust me, only cook or "bake" around 3 at a time. Be Prepared to smoosh them flat as soon as those puppies come out of the oven while they are warm - if you wait they will crack!!!! I used a Metal tub that was flat on the bottom to smoosh mine done flat. (also use a brown paper bag to line your baking sheet when baking the shrinky dinks)
5. last but not least once dry spray with a sealer. I used a Matte sealer.
(also the other blog mentioned that you could modge podge paper to the back of the charms!! I did not want to "commit' the charms on the bracelet to paper coloring and design that I was unsure that my mom would like, but I am so modge podging mine!)
Hope everyone has a good week!


OMGosh! What a super fabulous idea! I love the idea of putting your favorite pics on a charm bracelet...shrinky dink paper, who would've thought?!
ReplyDeleteThanks for sharing!
Great idea. By the way, I love the new layout.
ReplyDeleteDid you say Shrinky Dink?!?! I am soo in!!
ReplyDeleteGive me some modge podge & Shrinky Dinks - Love it!! Thanks for posting : )
Thats an amazing idea!
ReplyDelete♥
Love this!!
ReplyDeleteI'm thinkin' you're the
Queen of Crafting!
That's a fun project. I can totally see my daughter wanting to do this. She just discovered shrinky dinks this year.
ReplyDeleteLove it! Can't you just hold a monthly craft night and teach us how to be crafty?
ReplyDeleteI want to be crafty, but I'm lazy. But, I'll do anything for girl time. LOL!
I bet these would make a lovely gift, especially for Moms and Grandmas.
ReplyDeleteThis is so cool.
ReplyDeleteYou are incredibly creative!
I love this idea! Thanks for sharing and for visiting my blog! I am your newest follower too! Have a blessed day. Cindy
ReplyDelete